Selecting an Operation Theatre Surgical Light is not a simple matter of choosing the brightest fixture. Surgeons need controlled illumination, accurate color rendering, and minimal shadows during delicate procedures. Nurses need easy positioning, cleanable surfaces, and controls that respond without distraction. Facility managers also consider heat, energy use, maintenance, and ceiling compatibility.
Small details matter.
Dr. Atul Gawande, a respected surgeon and patient-safety expert, wrote, “Better is possible.” That principle applies to surgical lighting. A technically impressive lamp can still perform poorly if its arm drifts, its controls confuse staff, or its beam creates glare on polished instruments. Practical experience in operating rooms often reveals weaknesses that product brochures do not mention.
This guide examines seven useful considerations for choosing an Operation Theatre Surgical Light. It looks at illumination intensity, shadow management, color temperature, color rendering, movement range, sterilization needs, and backup reliability. Each factor affects visibility at the table. Each also affects staff comfort over long procedures.
There is no perfect light.
A brighter beam is not always better. A larger lamp is not automatically safer. Even experienced teams may overlook how quickly maintenance access, camera integration, or emergency power influence daily performance. These points deserve honest evaluation before installation.
The strongest decision combines clinical feedback, engineering evidence, and direct demonstrations. Ask surgeons to test the light with realistic instruments. Watch how the beam behaves around hands, heads, and equipment. Confirm the claims through documented specifications, service records, and dependable supplier support.
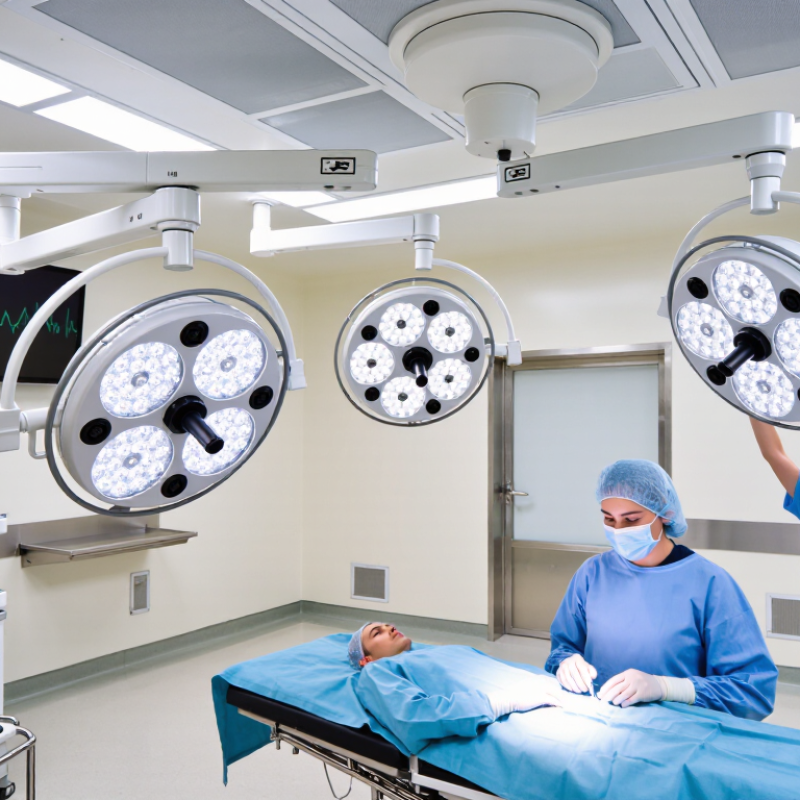
Choosing an operation theatre surgical light starts with performance, not appearance. A practical target range is 40,000–160,000 lux, depending on the procedure, working distance, and tissue depth. More light is not always better. Excessive intensity can increase glare, eye fatigue, and unwanted reflections from instruments.
Check the declared illuminance at the actual working field. Ask whether the measurement uses one light head or multiple heads. Shadow dilution matters when surgeons, hands, or equipment interrupt the beam. Color temperature, color rendering, beam diameter, and brightness control also affect tissue visibility. A bright center with poor peripheral coverage can still create frustration.
IEC 60601-2-41 defines particular safety and performance requirements for surgical and diagnostic luminaires. Confirm that test reports match the exact configuration being purchased. Documentation should identify measurement conditions, working distance, and applicable editions. A qualified technical team should review electrical safety, cleaning compatibility, heat output, and emergency operation.
Do not trust lux alone.
In real assessments, staff may focus on headline numbers and overlook handle movement or ceiling height. That assumption deserves questioning. Watch the light during a simulated procedure, not only in a showroom. Small positioning errors can expose dark areas. The best choice is the one that delivers stable, comfortable illumination under realistic clinical conditions.
| No. | Selection Tip | Key Performance Dimension | Recommended Evaluation Point | Why It Matters in the Operating Theatre |
|---|---|---|---|---|
| 1 | Define the Required Illuminance | Central illuminance should generally be adjustable within approximately 40,000–160,000 lux, depending on the procedure and the light’s rated operating conditions. | Confirm the manufacturer’s stated maximum and minimum illuminance, measuring distance, field diameter, and test method. | A wide adjustment range supports different procedures while helping staff avoid excessive brightness, glare, or unnecessary tissue heating. |
| 2 | Check Compliance with IEC 60601-2-41 | Safety and essential-performance requirements for operating and examination luminaires used in medical environments. | Request a valid declaration, certification, or test documentation showing conformity with the applicable edition of IEC 60601-2-41 and the general IEC 60601-1 requirements. | Standard-based verification helps evaluate electrical safety, mechanical safety, thermal performance, and essential operating functions. |
| 3 | Evaluate Light Field Quality | Field diameter, uniformity, shadow dilution, and the ability to maintain illumination when the surgeon or instrument partially obstructs the beam. | Compare the reported light-field diameter and shadow-management results using the same measurement conditions. | Good field quality improves visibility across the wound and reduces the need for frequent repositioning during surgery. |
| 4 | Assess Colour Rendering and Colour Temperature | Colour Rendering Index (CRI), special red rendering value where provided, and adjustable correlated colour temperature (CCT). | Look for published photometric data, stable colour performance at different intensity settings, and a CCT range suitable for clinical assessment. | Accurate colour perception can assist the clinical team in distinguishing tissue characteristics, blood, and anatomical structures. |
| 5 | Control Heat and Energy Output | Radiant heat, LED thermal management, power consumption, and temperature increase near the illuminated field. | Review thermal test data and confirm that the light maintains stable output without creating excessive heat for the patient or surgical team. | Effective thermal control improves comfort, supports patient safety, and helps preserve LED and electronic-component service life. |
| 6 | Verify Positioning and Sterile Usability | Arm reach, rotation range, balance, handle design, sterile handle compatibility, and ease of adjustment. | Test movement from multiple approach angles and confirm that the light remains stable after positioning. | Smooth, precise positioning reduces workflow interruptions and allows adjustment while maintaining aseptic technique. |
| 7 | Review Reliability, Cleaning, and Serviceability | LED operating life, backup power behaviour, cleaning compatibility, ingress protection where specified, and preventive-maintenance requirements. | Request service intervals, replacement-part availability, battery specifications if applicable, and approved disinfectant compatibility. | A maintainable luminaire helps reduce downtime, supports infection-control procedures, and preserves consistent illumination over its service life. |
| Note: Illuminance values are product-performance criteria, not a substitute for a complete clinical risk assessment. Confirm the applicable regulatory requirements, the current edition of IEC 60601-2-41, installation conditions, and the healthcare facility’s procurement specifications before purchase. | ||||
Choosing an operating-theatre surgical light requires more than checking brightness. Color quality affects how clinicians read tissue, vessels, sutures, and subtle bleeding. A high Color Rendering Index (CRI) of 90 or above is a useful baseline. It indicates broad color fidelity across standard test samples. However, CRI alone can mislead. R9 matters because it evaluates saturated red tones. A value of at least 50 can support clearer views of blood-rich tissue and wound edges. These numbers are not magic.
During a practical evaluation, place the light over a simulated field and inspect red gauze, skin-toned materials, and white instruments. Compare them under different intensity levels. Some lights shift color when dimmed. That detail is easy to miss. Ask for test reports, not only brochure claims, and check whether measurements follow recognized photometric methods. Independent verification is preferable when procurement decisions carry high clinical consequences. A technically strong CRI cannot compensate for glare or distracting reflections.
A color temperature between 3,000 and 5,000 K offers useful flexibility. Warmer settings may feel comfortable during long procedures, while cooler settings can improve perceived contrast. The best choice depends on the specialty, camera system, and room surfaces. Do not assume 4,000 K fits every theatre. A specification sheet can look reassuring, but it is not the operating room. Record tissue appearance at each setting before approving the light.
7 Tips for Choosing an Operation Theatre Surgical Light
Shadow control deserves more than a bright specification. Multi-LED systems use overlapping light paths, so one blocked beam does not create a deep dark patch. Shadow-dilution technology is most useful when staff, instruments, or retractors enter the field. The World Health Organization estimates that more than seven million patients experience disabling surgical complications annually. Reliable visibility remains a practical safety concern, not a decorative feature.
Tip 1: Ask for measured shadow-dilution results, not marketing language. IEC 60601-2-41 provides a recognized framework for evaluating surgical luminaires, including illuminance and shadow-related performance. Request test conditions, working distances, and obstruction patterns. A lamp that performs well at one distance may disappoint above a deep cavity.
Tip 2: Test the light with realistic obstructions. Place a hand, head, and instrument between the luminaire and a textured target. Check whether tissue edges remain visible. Tip 3: Compare several LED configurations. More LEDs do not automatically mean better control. Beam overlap, optical design, and adjustment stability matter. A 2023 AORN guideline emphasizes assessing surgical lighting during room planning, installation, and clinical use. That practical point is often missed. Tip 4: Inspect color rendering and glare at the same time. Strong shadow dilution cannot compensate for washed-out reds or uncomfortable reflections. Document observations from the surgeon, assistant, and sterile nurse. Their feedback may conflict. That is useful evidence, not a problem.
When choosing an operating theatre surgical light, sterility should guide the evaluation from the start. Examine the housing for sealed joints, smooth surfaces, and minimal dirt traps. Avoid exposed screws or deep grooves near the sterile field. These small details matter during repeated cleaning cycles.
Check whether the sterile handle can be removed, disinfected, and replaced without tools. Confirm that its material tolerates the approved cleaning agents used in your facility. A bright light is not enough. In practice, glare, heat, and difficult cleaning can disrupt a carefully prepared procedure. Request documented test results, but verify the cleaning workflow with theatre staff.
Positioning deserves a hands-on trial. Move the light over the table, then lower it toward the surgical site. The arm should remain balanced, quiet, and easy to control with a gloved hand. Test the full 360° maneuverability around anesthesia equipment, monitors, and other lights. Check for collisions at different ceiling heights. Even a small blind zone can force awkward posture. That is often overlooked.
Observe how quickly the light returns to position after being moved. Slow adjustment wastes attention. Excessive resistance causes fatigue. My assessment would include a simulated procedure, not only a showroom demonstration. Real rooms are crowded, and perfect movement on paper may fail beside real equipment.
This checklist groups seven practical evaluation points into three decision areas. Sterility focuses on smooth cleanable surfaces, sterile handles, and control access. Positioning covers reach, balance, locking, and collision-free adjustment. 360° maneuverability considers independent arm movement and access from multiple sides of the operating table.
Use the chart as a pre-purchase checklist and verify the final product against applicable requirements, including IEC 60601-2-41 and local infection-control procedures.
Verify heat performance before judging brightness.
Tip 1: Run the light for several hours and measure temperature near the wound area. A cool beam protects tissue and improves staff comfort.
Tip 2: Check the heat-management design, not only the lamp temperature. Excess heat can make long procedures uncomfortable.
Tip 3: Test movement with gloved hands. The light should reposition smoothly without drifting or requiring repeated adjustments.
Energy performance deserves equal attention.
Tip 4: Compare power consumption at the same illumination level. A brighter light is not automatically more efficient.
Tip 5: Confirm light output stability during voltage changes and extended use. Flicker is easy to overlook during a short demonstration. It matters later.
Tip 6: Ask for test records, service intervals, and expected component life. Sales claims alone are not enough. I have seen promising specifications lose value when maintenance details were vague.
Safety checks should happen in the actual theatre.
Tip 7: Inspect shadow control, sterile-handle compatibility, emergency backup, and cleaning resistance. Verify that controls remain visible without distracting the surgical team. Invite surgeons, nurses, and technicians to test the unit together. Their feedback may conflict, which is useful. A practical assessment should record heat, energy use, movement, illumination, and cleaning time. Do not approve a light because it looks impressive in a showroom. Test it where real procedures happen.
Are you still planning to build your shipping container home this year? How about you could save up to $5,000 in delivery costs towards your project?
With the Tiny Home Expos in Brisbane, Adelaide and Canberra in the coming months, we are offering FREE DELIVERY (*up to $5000) to each state the Expo is in, in exchange with using your project as a display at the show. Offer expires 8 weeks before each Expo and limited to ONE project per Expo ONLY so reach out to us now to secure your spot!
Enquire Now