Bicycle End Caps are small parts, but they protect exposed cable strands from fraying, moisture, and snagged fingers. On a commuter bike, a loose end can catch a glove during a roadside adjustment. On a mountain bike, mud and repeated cable movement can make a rough cut worse. The right cap cannot fix damaged housing. It can help keep a properly trimmed cable tidy.
Bicycle mechanic and technical author Lennard Zinn is known for practical repair guidance that stresses careful setup and inspection. A useful takeaway for this guide is simple: protect the cable end, then check it again. This is a paraphrase, not a direct quotation. Fit still matters. A cap should suit the cable’s diameter and material, and it should stay secure without crushing the strands. Crimping matters, too. Too little pressure may let the cap slip; too much can deform it.
The seven options below are compared for fit, material, installation, and everyday durability. Some are basic aluminum sleeves. Others offer different finishes or pack sizes for home mechanics and workshops. Price alone tells little. Check the cut cable first, and replace frayed strands before fitting a cap. Small detail. Real payoff. Still, end caps are not a cure-all; they need a clean cut and sensible installation. That distinction is easy to overlook.
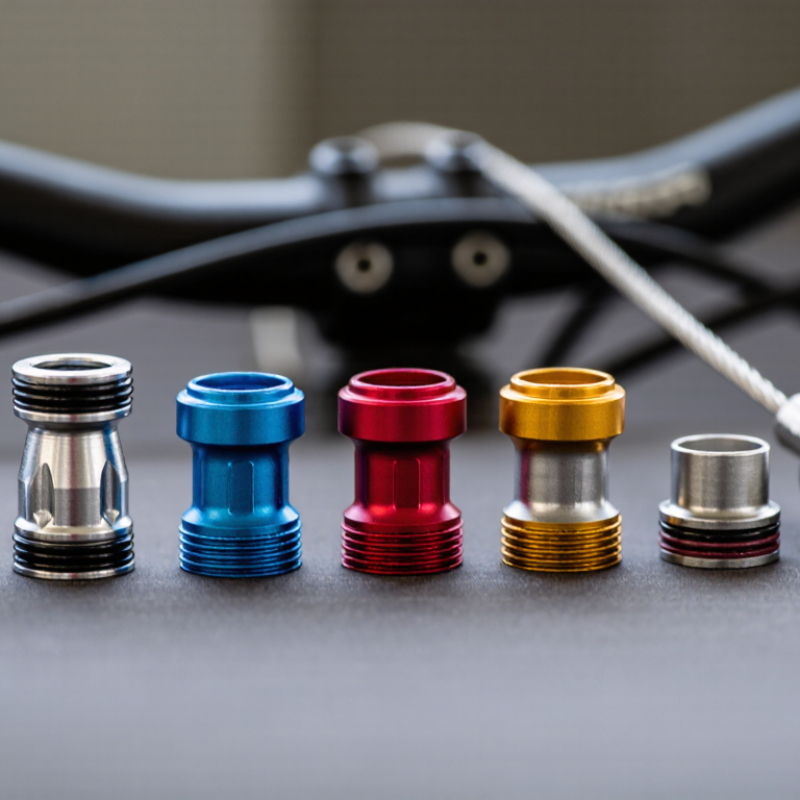
Bicycle cable end caps are small sleeves fitted over the freshly cut ends of brake or shift cables. A mechanic crimps one onto the exposed wire with cable cutters or pliers designed for the job. The cap holds loose strands together, helping prevent fraying and reducing the chance of a sharp wire catching skin or clothing. It also keeps the cable end neater during adjustments. Small part. Real job.
A cable end cap is different from a housing ferrule, which sits on the outer cable housing and helps it seat properly in a stop. Neither part repairs a damaged cable or guarantees protection from water and corrosion. A loose cap can slip off, while an overly tight crimp may deform the wire. Check that the cable strands are tidy, then crimp firmly without crushing the cable. It is easy to treat this step as cosmetic, but a quick inspection can reveal a cap that has shifted or a cable that is already fraying.
Shift cables are commonly about 1.1 mm in diameter, while brake cables are commonly about 1.5 mm. Choose an end cap that fits the cable wire, and check the cable specifications because sizes can vary.
When choosing bicycle cable end caps, start with fit, not color. The cap must match the exposed inner cable’s diameter and material. A loose cap can slip off; one that is too tight may be difficult to install cleanly. Small parts matter. Check product dimensions rather than assuming all brake and shift cables are identical.
Look for a cap that crimps securely without crushing the cable strands. Aluminum caps are light and common, while brass options may resist corrosion well in damp conditions. Either material can work, but the crimp matters more than a flashy finish. Use suitable cable cutters, then squeeze the cap with dedicated crimping pliers. Ordinary pliers may leave sharp edges or an unreliable hold. I still double-check the result by tugging gently; a tidy appearance alone proves little.
Consider the riding environment, too. Rain, road spray, and winter grit can expose weak finishes over time. Rounded edges help reduce snags on clothing or nearby components, and a visible color can make inspection easier. Avoid caps that add bulk near tight frame passages. They are not housing ferrules, so confirm you are buying the right part. Recheck the cable after installation, especially if shifting or braking feels different. A cap protects the cable end, but it cannot fix frayed strands or poor adjustment.
Seven Top Bicycle Cable End Caps for 2026
A cable end cap keeps a freshly cut brake or shift cable from unraveling and scratching nearby parts. The best fit depends on cable diameter, available clearance, and riding conditions. Seven useful options stand out: lightweight aluminum caps, durable brass caps, corrosion-resistant stainless steel caps, color-coded caps for easier cable identification, low-profile caps for crowded handlebars, flexible polymer caps for softer contact, and heat-shrink sleeve caps for added coverage. Small parts. Big difference.
Aluminum suits everyday repairs and adds little weight. Brass is easy to crimp, while stainless steel can better withstand wet, gritty rides. Color helps distinguish cables during maintenance, but it does not improve performance by itself. Low-profile designs can reduce interference near shifters or frame stops. Polymer styles may feel gentler against paint, though their grip and durability vary. Heat-shrink options cover more cable, but need careful sizing and even warming.
Check that the cap matches the cable, not the housing; those are different components. Use a proper cable cutter for a clean end, then crimp the cap firmly with a suitable tool. Avoid crushing it flat. After installation, tug the cable lightly and inspect for loose strands or sharp edges. One small annoyance: tiny caps are easy to misplace on a messy workbench. There is no perfect style, so fit and a secure crimp matter most.
A secure cable end cap keeps loose strands from fraying and scratching hands during routine repairs. Use a proper cable cutter; ordinary pliers can crush strands and leave a ragged end. Cut the inner cable cleanly, leaving enough length for future adjustment. Slide on a cap that fits snugly, with no visible strands escaping. Crimp it firmly with cable-end pliers, but do not flatten it into a sharp edge. Small detail. Worth checking.
Before riding, pull the brake lever several times and shift through every gear. Check that the cap cannot touch the tire, spokes, rotor, or moving parts. ISO 4210-4:2023 specifies bicycle brake-test methods; a cable cap does not replace a brake inspection. PeopleForBikes’ 2023 U.S. Bicycling Participation Report estimated that 112 million Americans rode a bicycle in 2022. That figure describes participation, not cable failures, but it shows why clear, repeatable maintenance matters across many bikes. If the cable slips, strands remain exposed, or braking feels different after installation, stop and correct the fit before riding. A slightly imperfect cut may still accept a cap, though replacing a badly frayed cable is the safer choice.
Inspect bicycle cable end caps whenever you clean the bike, adjust the brakes, or notice rough shifting. Look closely. A cap should sit firmly over the cut cable end, with no visible strands poking through. Check for splits, a crushed shape, looseness, or rust-colored staining near the cable. These small signs can mean the cap no longer protects the wire from fraying or moisture. Pay extra attention after a wet ride or when a cable has recently been trimmed.
Replace a cap if it slips off easily, has sharp edges, or leaves cable strands exposed. A loose cap can snag clothing or skin during routine maintenance, while a frayed cable may become harder to thread through a housing. Use a cap that fits the cable diameter, then crimp it securely with suitable cable cutters or crimping pliers. Do not crush it flat. Check that the cable still moves freely afterward. I would not treat a tidy-looking cap as proof that the cable beneath it is sound; inspect the exposed wire too. If strands are broken near a brake or shifting mechanism, replacing the cable may be wiser than fitting a new cap alone.
| Rank | Cable End Cap Type | Best For | Compatibility and Fit | Key Benefit | Inspect and Replace When |
|---|---|---|---|---|---|
| 1 | Standard aluminum crimp cap | Everyday road, hybrid, and mountain-bike cable ends | Choose a cap that matches the inner cable diameter; brake and shift cables commonly use different sizes. | Lightweight and easy to crimp with suitable cable cutters or crimping pliers. | Replace if it is loose, split, sharply deformed, or no longer covers the cable strands. |
| 2 | Copper-alloy crimp cap | Routine repairs where a secure, durable crimp is needed | Check that the cap’s opening fits the cable without forcing the strands together. | Forms a firm crimp that helps keep cut cable strands from fraying. | Replace if the crimp has loosened, the cap has cracked, or corrosion is visible. |
| 3 | Brass crimp cap | General-purpose repairs and riders who prefer a corrosion-resistant metal option | Confirm the listed size for the specific brake or shift cable; cap dimensions are not universal. | Durable construction and resistance to ordinary moisture exposure. | Replace if it is badly corroded, distorted, or able to slide along the cable. |
| 4 | Stainless-steel crimp cap | Wet-weather or frequently washed bicycles, when a correctly sized cap is available | Use only a cap designed to crimp onto the cable; verify a snug fit before installation. | Offers strong corrosion resistance compared with untreated metals. | Replace if the cap is loose, damaged, or has sharp edges that could snag clothing or skin. |
| 5 | Long-barrel crimp cap | Cable ends with more exposed strands or installations needing extra coverage | The barrel must fit the cable diameter and leave enough room for a secure crimp. | Provides a longer covered section at the cable tip than a short cap. | Replace if the longer barrel is crushed, split, or cannot be crimped firmly. |
| 6 | Large-bore crimp cap | Cables that are too thick for a standard small-bore cap | Match the opening to the measured cable diameter; do not force a mismatched cap onto the strands. | Helps avoid splaying or damaging strands during fitting. | Replace if it rocks, slides, or fails to grip the cable after crimping. |
| 7 | Color-coded crimp cap | Workshops or multi-bike setups where cable ends need easy visual identification | Color is not a reliable size standard; check the actual dimensions and material specifications. | Makes cable ends easier to distinguish during inspection and maintenance. | Replace if the cap is damaged or loose, regardless of whether its color remains intact. |
Inspection tip: Check cable end caps after trimming or servicing a cable and during routine bike maintenance. A cap protects the cut end from fraying; it does not repair a damaged cable. Replace a frayed, kinked, or corroded cable rather than relying on a new cap alone. This table covers inner-cable end caps, not housing ferrules.
Are you still planning to build your shipping container home this year? How about you could save up to $5,000 in delivery costs towards your project?
With the Tiny Home Expos in Brisbane, Adelaide and Canberra in the coming months, we are offering FREE DELIVERY (*up to $5000) to each state the Expo is in, in exchange with using your project as a display at the show. Offer expires 8 weeks before each Expo and limited to ONE project per Expo ONLY so reach out to us now to secure your spot!
Enquire Now